Chassis Strengthening Kits on the market from different sources
|
I have elected to go with the CTM chassis strengthening kit but there are others out there that are very good. Both Revington TR and Moss Europe have kits that come with fitting instructions. I will photograph my installation as there is no good photographic guide out there on how to fit any of these kits. It looks like the Revington Instructions are the most comprehensive. Colin at CTM is very helpful and can guide you through the process of how to fit the kit. Good to know someone is at the end of the phone.
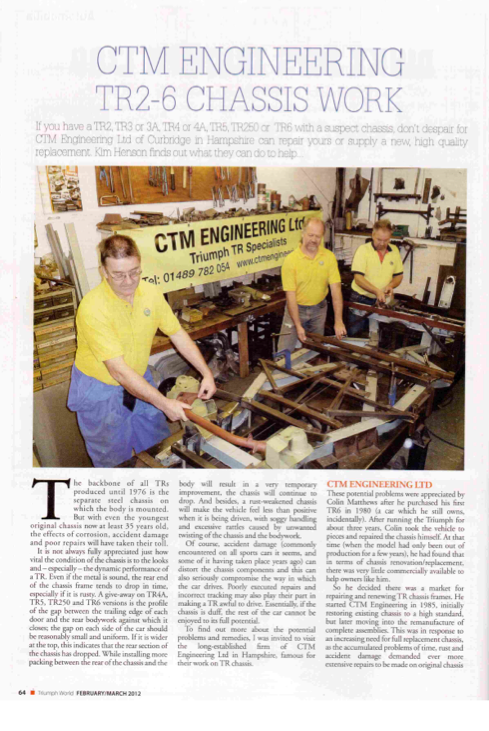
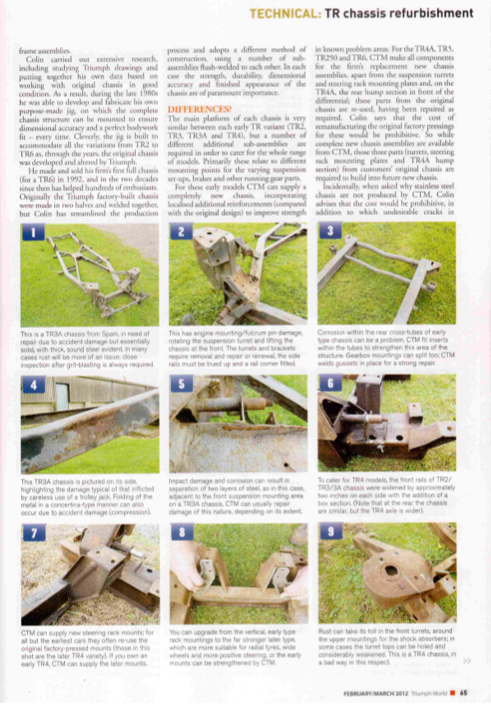
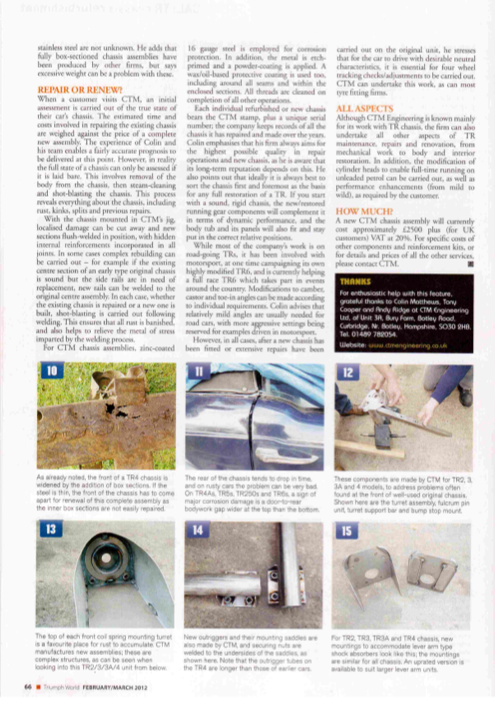
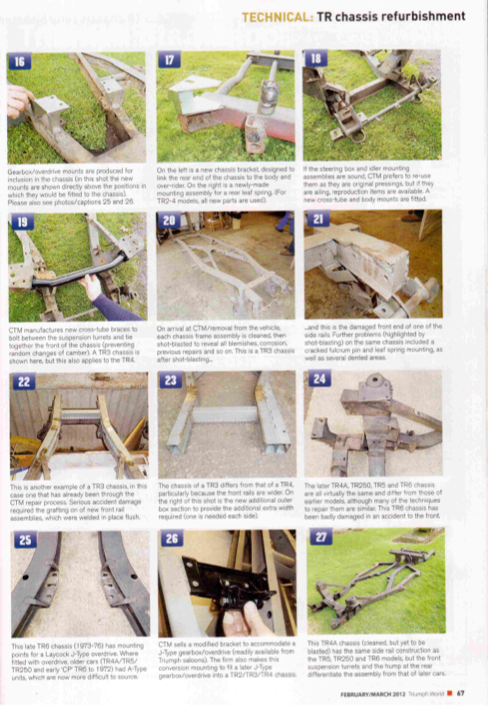
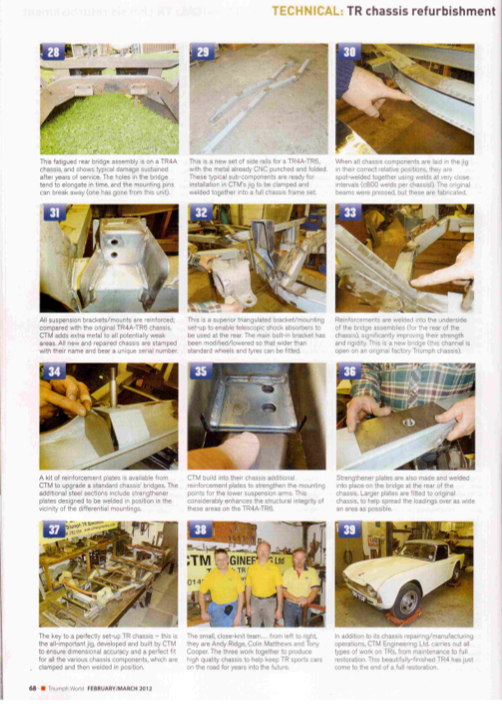
CTM had an excellent article in Triumph World Magazine. Click on the PDF Download on the right under the CTM banner to see it. Basically covers the extensive process and strengthening CTM go to when building a chassis.
|
| ||||||||
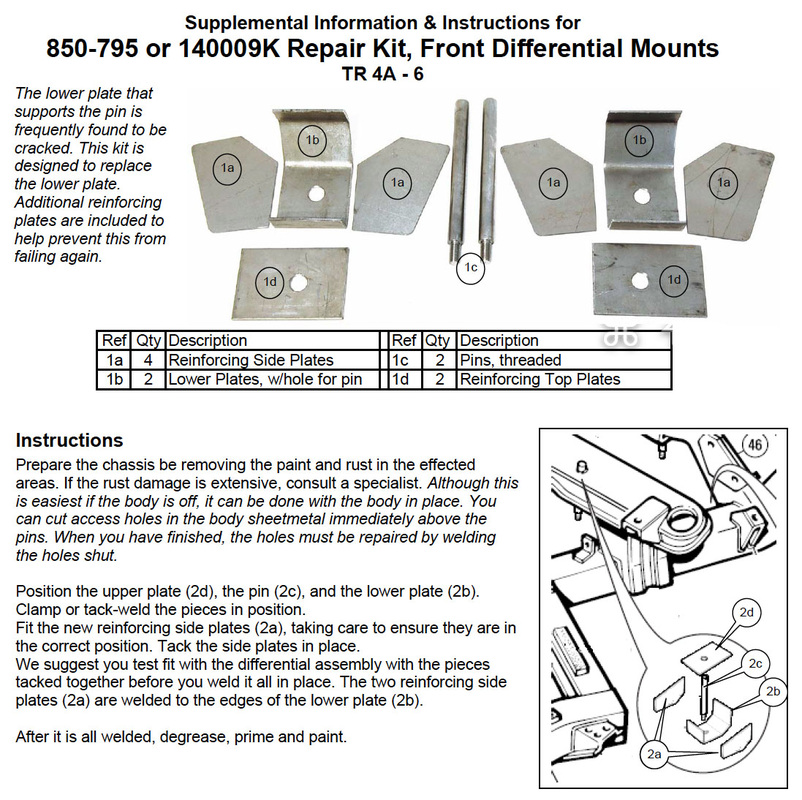
The Moss Europe Chassis strengthening kits Instructions
Click 'Download file' to get the pdf of the Moss instructions.
You can visit the items on the Moss website relating to the chassis strengthening kits here. Revington TR Chassis Strengthening KitsYou seem to get extra bits of metal with these kits and well written instructions. Follow these links to see them.
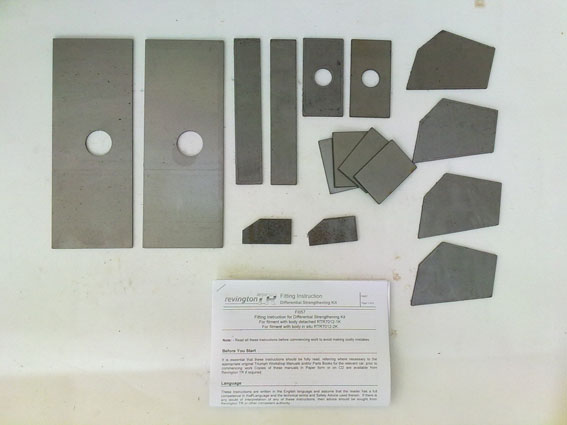
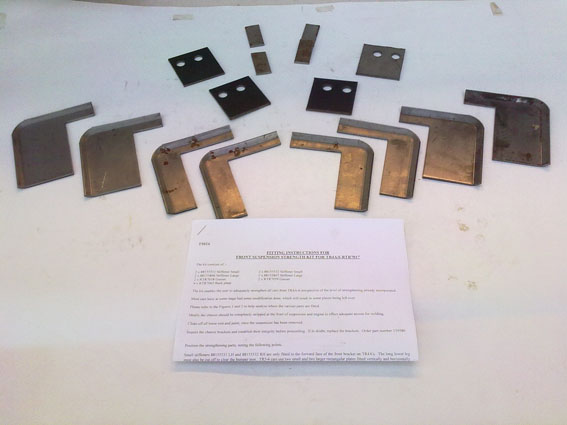
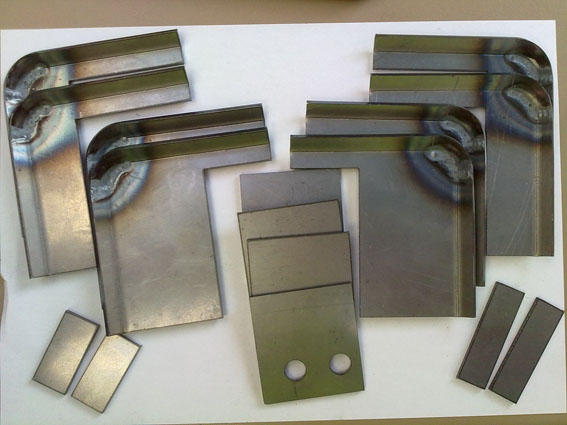
TR4a Body Off Diff Strengthening £51.97 inc VAT TR4a Front Suspension Strengthening Kit £72.91 inc VAT The Pictures Below are of The Revington Kits. Below that is what Revington say about their kits and why you should strengthen a chassis. | |||||||||
Revington TR diff strengthening KitDiff kitTR4AIRS-6 Diff mount strengthening kit; for fitment to the chassis with the body taken off. If the body and the chassis are staying together, order RTR7012-2K
Front suspension kitTR4A-6 front suspension strengthening kit. The lower inner wishbone brackets welded to the chassis are prone to breaking away. Our kit will help prevent this happening.
The chassis fitted to TR4A's, TR250, TR5 and TR6 are in essence the same, particularly where the front suspension attaches. The brackets welded to the chassis that support the lower inner wishbones, are a weak point. Triumph were aware of this as, without an official recall, TR4A's (and later TR5 and TR250) were modified by dealers when ever an unmodified car appeared in their workshops. The official modification consisted of a strengthener welded to one side of the chassis support bracket. This was effective to a point but by the time the TR6 arrived additional strengtheners were added. Whilst better, this level of improvement was not quite enough and chassis' continued to fail. Our kit will provide all the parts for a comprehensive fix. You may need to replace the lower wishbone brackets 148691 (second hand available too 148691SH) as the studs are often damaged. This kit is a combination of replications of the original strengtheners and Revington TR developed additions. In particular our kit includes a strengthener, which fits behind the support bracket to double the thickness of the metal where the lower wishbone fulcrum brackets (part number 148691) attach. This proved important, as the side strengthening of the support bracket moved the weak point along the chain to the lower wishbone fulcrum bracket stud attachment holes, resulting in the studs pulling though the chassis support bracket rather than tearing it off the chassis, which happened previously! If the original chassis brackets are too badly damaged to be simply strengthened, and new ones are required, the part number to purchase is 139580. |
Revington TR front suspension strengthening kitThe doubling of thickness in this area may result in modified wishbone fulcrum brackets with longer studs being required. Revington TR have produced such a bracket. This bracket with longer studs will certainly be required if negative camber is to be set. Order part number RTR3287 below.
This strength kit can in be fitted with the engine and the body in place |
Rimmer Brothers Chassis Strengthening Kits
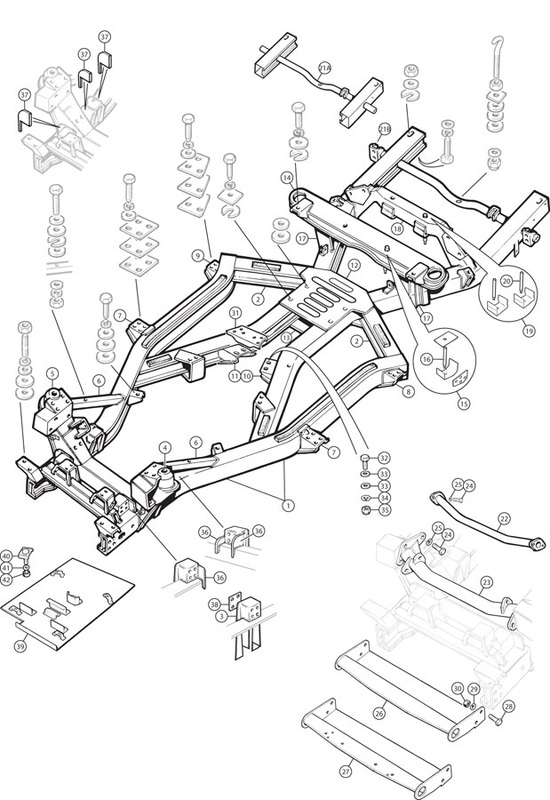
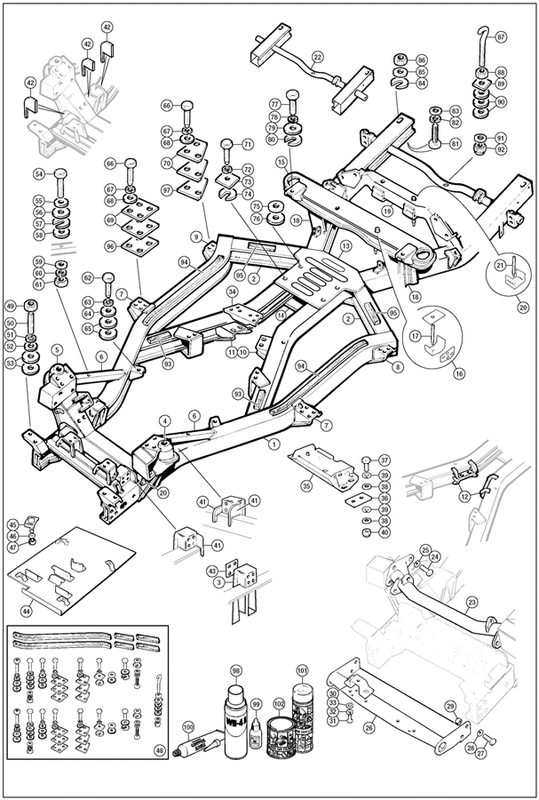
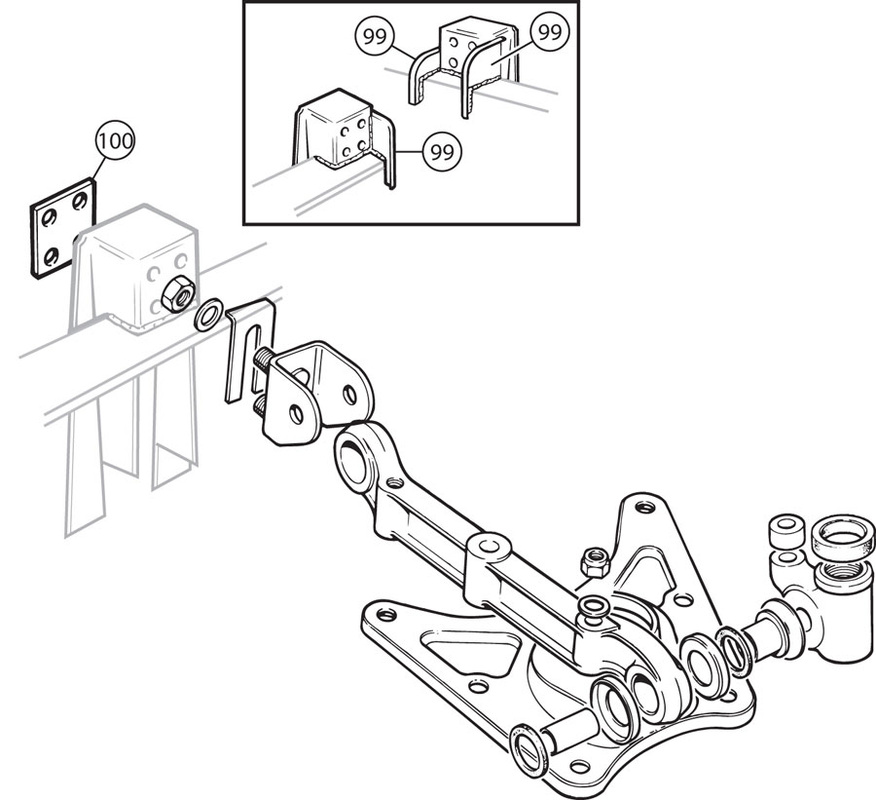
Rimmer Brothers have some good strengthening kit and some great diagrams on where they go for installation. I have included some of them here.
|
CHASSIS ROT & FATIGUE
The IRS chassis was a compromise which enabled Triumph to go independent without spending too much. Regrettably this left a few development needs for customers to discover. Designs exist for beefing up lower fulcrum brackets and differential mountings which were not made public as a massive recall would have been financially devastating for the cash strapped company in the mid 1970s. Originally, these chassis were given only a coat of chassis black enamel. Modern paint or galvanising procedures would have controlled corrosion but fatigue problems were inevitable, so should be faced at the first opportunity. The differential mountings can be tackled from underneath although a popular route in the past was through the rear floor area, which may explain some unusual welding visible when the carpet is lifted. The pins could be re-welded and hopefully reinforced as well but the only proper solution is with the body off the chassis and to replace the pins and associated fixings completely with heavier gauge, reinforced units, which fully box the pins. The trailing arm chassis legs collect water and fatigue too, so should never be repaired: replacement is essential. This requires removal of the upper and lower cruciform (or breast) plates to permit full seam welding. The corrosion at the rear end of the chassis can be rampant, hence the need for ill. No. 21 (RR1324). Fatigue to the differential bridges also quite frequently necessitates complete replacement. At least the replacement bridges carry all the necessary strengthening modifications. The side braces, ill. No. 6, collect water and rot. After replacement, don’t forget to drill water outlet holes at their bases. Cars can suffer from fatigue to the gearbox mounting brackets and should be replaced as required. A little extra reinforcement here does not go amiss. Don’t for get that the 3/8" washers under the four fixing bolts should be hardened, not mild steel which soon wear and allow gearbox movement. |
The front suspension chassis brackets, ill. No. 3 fatigue and are easily damaged in accidents or even kerbing. These must be carefully inspected and replaced if showing any untoward signs. Either way, fitment of the reinforcement plate (Ill no. 36 or 37) is recommended and adhere to the 25-ft/lbs. torque clamping the lower fulcrum brackets to the chassis. Finally remember, your chassis is very old and may have had an unhappy previous life. Accident stress might not make itself known for thousands of miles and may be hidden by paint or underseal. Strengthening Lower Wishbone Arm Brackets The lower front inner wishbone brackets (illus. no.3) which are welded to the chassis, are considered weak points of the front suspension as they are often found to be cracked or even broken away from the chassis. This is usually caused by running into pot holes or hitting kerbs. These brackets are easily replaced by a competent chassis repair workshop, and represent a considerable improvement to the earlier TR2, TR3, TR3A and TR4 design. It’s a good idea to periodically check these brackets, and have them replaced or reinforced if they are cracked or broken, as this condition presents a severe safety hazard. We have followed a design from Triumph themselves and produced a strengthening kit which comprises three plates that are welded to the inner wishbone bracket and the chassis. |
